Set Up Your WordPress E-commerce Store Today
A WordPress E-commerce store is an online store built using WordPress and an e-commerce plugin. It is a powerful platform where e-commerce stores can be easily built. There are tons of powerful plugins such as BigCommerce, Easy Digital Downloads, WooCommerce, and WP eCommerce. If you are planning to sell your products and services online then this can easily be done by setting up a WordPress e-commerce store. In the store, you will find a homepage, pages listing your products, a shopping cart, a checkout page, and an order and payment confirmation page. Besides these, the store can also have additional pages like an About page or a Contact page. Offers and discounts for first-time customers can also be displayed in the store.
How to set up a WordPress E-Commerce store
You can set up a full-fledged professional booking e-commerce store on WordPress and easily start selling your products and services with these few simple steps:
Choosing a domain name and hosting
When picking a domain name, it’s important to ensure that it is easy to remember and spell. Avoid using numbers, hyphens, or odd spellings that may confuse visitors. A domain name that mirrors the brand and niche of the website can help to attract the right audience. For instance, a tech blog could contain the word “gadgets” or “reviews” in its domain name. Selecting a dependable hosting provider is also critical. The hosting provider is in charge of keeping the website running smoothly.
It’s critical to select a hosting provider with fast loading times, reliable uptime, and strong security features. While selecting a hosting provider, one should keep their budget in mind and look for discounts and offers to save money. Numerous hosting providers provide specialized WordPress hosting plans with features like automatic updates, pre-installed plugins, and optimized performance for WordPress, making it easier to manage a WordPress website.


Installing an e-commerce plugin
Adding an e-commerce plugin can transform a WordPress website into a fully functional online store with product listings, payment processing, order management, and inventory tracking.To install the plugin, select a suitable option from the various free and paid choices, access the WordPress dashboard, and install from the “Plugins” tab. After installation, activate the plugin from the “Plugins” page and configure payment gateways, add products, and customize the store’s appearance. The setup process may vary depending on the selected plugin.
It is crucial to test the store after installation to ensure proper functioning, including making test purchases, checking payment and order processing, and verifying inventory levels.WooCommerce, Easy Digital Downloads, WP eCommerce, Shopify, Ecwid, BigCommerce, MemberPress, Cart66, MarketPress, Jigoshop, Selz, WP EasyCart, SendOwl, Gumroad, and Shopp are some of the e-commerce plugins to choose from
Setting your store up
Setting up an online store can be done quickly and easily with the free eCommerce plugin, WooCommerce. Install and activate the plugin and use the setup wizard to configure basic store settings. Configure shipping zones and rates by creating shipping zones and adding shipping methods. Configure tax rates by creating tax classes and rates in the WooCommerce settings. Set up payment options by enabling payment gateways and customizing payment settings.Test your checkout process before launching your store to ensure that everything works smoothly. To do this, place a test order and verify that the shipping and tax rates are calculated correctly and the payment gateway works properly. In summary, use WooCommerce to set up an online store quickly and easily, and configure store settings, shipping, taxes, and payments.


Selecting a theme
: Choosing the right WordPress theme is essential for creating a functional and aesthetically pleasing website that meets your needs. Consider your website’s purpose, such as whether it’s a blog or an e-commerce site, and choose a theme accordingly. Look for a responsive theme that can adjust to different screen sizes and is optimized for mobile users. Also, check the customization options to ensure you can personalize the layout, colors, and fonts to fit your branding. Choosing a lightweight and fast-loading theme can improve your website’s loading time and user experience.
Check reviews and ratings from other users to ensure the theme is reliable. While free themes are available, investing in a premium theme might be worth considering for additional features, support, and updates.There are free themes like Astra, OceanWP, Hestia, Ashe, Neve, Zillah, Bento, Sydney, GeneratePress, Shapely,etc and premium ones like Divi, Avada, X Theme, The7, Bridge, Flatsome, Enfold, BeTheme, Jupiter X, Salient.etc
Adding products
To add products Begin by logging into the WordPress admin dashboard. Proceed to the Products tab on the left-hand menu and select the Add New option. Input the relevant information such as the product name, description, and other necessary details in the fields provided. Upload product images by using the Set Product Image button. If product categories and tags have already been set up, add them as well. Set the product price and enter any additional details such as sale price, tax status, and shipping information as needed. To add different product variations, such as colors or sizes, select the “Variations” tab. Additional options such as inventory management and stock status can also be set if desired. Finally, click on the “Publish” button to make the product live on your website.

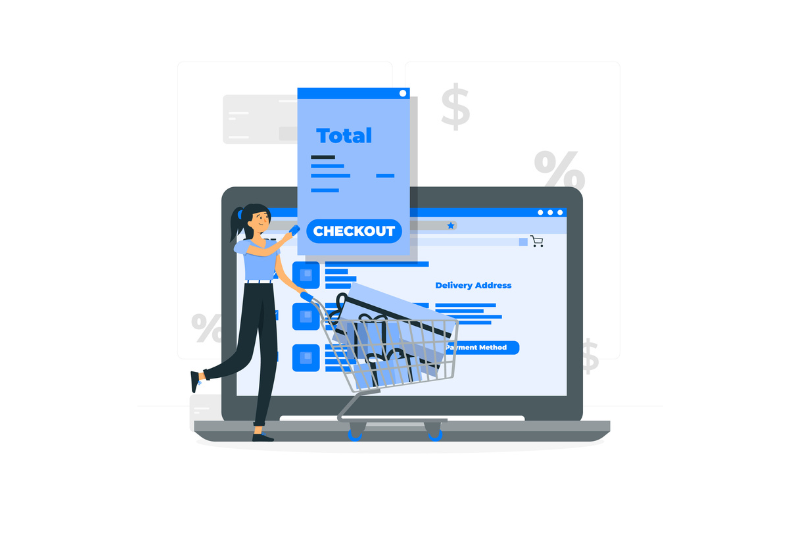
Setting up a shopping cart and checkout page
Setting up a shopping cart and checkout page in WordPress involves key steps for a smooth online shopping experience. Choose a reliable e-commerce plugin, configure settings, add products, and customize the cart and checkout pages. Ensure security with SSL encryption, conduct thorough testing, and optimize for mobile responsiveness. With clear calls to action, guide customers through a seamless checkout process. By following these steps, you create a secure and user-friendly online store on your WordPress website.
Testing your store
If you have established a WordPress store, there are numerous steps you can take to evaluate its performance. The first step is to verify the functionality of your store by ensuring that all buttons, links, and forms are functioning correctly, and that you can add products to your cart and complete the checkout process. The second step is to test the payment gateway by making a test purchase and ensuring that the payment gateway is operating correctly. If you do not want to proceed with the purchase, you can refund the payment later.
The third step is to scan your store for any errors or problems that need to be addressed. The fourth step is to view your store on different devices and screen sizes to ensure that it is responsive and visually appealing. Finally, use tools such as Google PageSpeed Insights or Pingdom to evaluate the loading speed of your store. By testing your WordPress store, you can identify any issues or errors and fix them before your customers experience them, which can result in a better user experience and potentially increase your sales.


Making your store live
If everything seems okay and you are satisfied with the test, you need to follow some steps. First, you’ll need to choose a web hosting provider that can handle the traffic to your store. Once you’ve selected a provider, you’ll need to install WordPress on your server and choose a theme that suits your needs. Next, you’ll need to install an eCommerce plugin, such as WooCommerce, and add your products to your store with detailed descriptions and images. You’ll also need to configure payment and shipping options to ensure a seamless customer experience. Before launching your store, be sure to thoroughly test your site to ensure everything is working correctly. Finally, you can make your store live and start promoting it through social media and other channels to drive sales.